Navigation Menu

Tuesday, May 31, 2016

Make Smokey BBQ Chicken Tandoori At Home

Today, I will be sharing the most popular dish of India. This roasted chicken is a highly preferable dish eaten as in starters or as a main course if you're having a backyard bash. Not only is this dish absolutely delicious and smoky in flavor, it's an ancient dish of the Mughal era times. I love the Mughal inspired roasted chicken marinated with full of spices and yogurt onto the skewers & heated by charcoal. 

This is a perfect recipe if you're going for camping or RV trips. We try this recipe during our camping trips as it is a great meal to feed my big family. Try this marination at home, you'll never buy the ready-made stuff, I promise! You can serve chicken over rice or with a simple veggie dish. If you make this, do come back and leave a comment telling us what you think!. Enjoy cooking!

BBQ Chicken Tandoori

Make Smokey BBQ Chicken Tandoori At Home www.thehoggerz.com

Preparation Time: 25 minutes
Cooking Time: 25 minutes
Total Time: 50 minutes
Serves: 2 persons


Chicken Tandoori Masala Ingredient:
2 tablespoons red chili powder
1/2 teaspoon nutmeg powder
1 teaspoon cinnamon powder
1 teaspoon black pepper powder
1 tablespoon cumin powder
3-4 black cardamom
1/2 teaspoon fennel seeds powder
1/2 teaspoon mace powder

Method:
Mix 2 tablespoons red chili powder, 1/2 teaspoon nutmeg powder, 1 teaspoon cinnamon powder, 1 teaspoon black pepper powder, 1 tablespoon cumin powder, 3-4 black cardamom, 1/2 teaspoon fennel seeds powder and 1/2 teaspoon mace powder and store it in an air tight jar. Use whenever needed.

Ingredients for Chicken Marination:
1-2 chicken leg or breast pieces -  I have shared this recipe with little quantity of ingredients, especially for the newbies trying this recipe. 
1/2 teaspoon chicken tenderizer
1 tablespoon garlic paste
1 tablespoon ginger paste
2 tablespoons lemon juice
2 tablespoons whisk yogurt
2-3 tablespoon home-made tandoori masala powder
1 lemon for garnishing
1 teaspoon chat masala for garnish

Marination: 
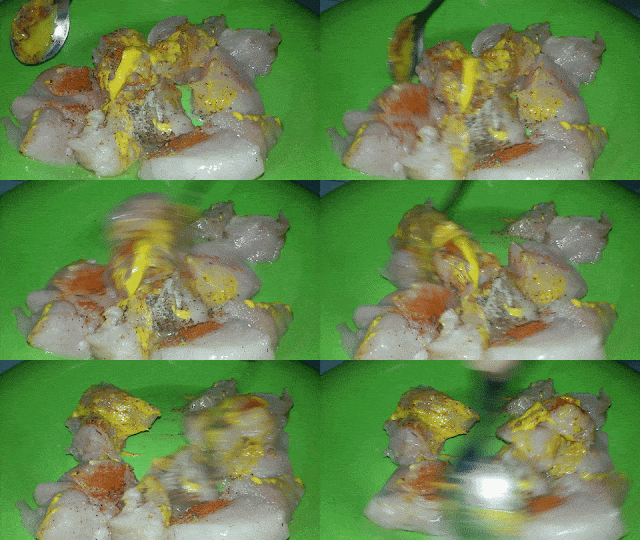
  • Give cuts in the flesh of chicken pieces so that all the spices and flavor penetrates easily into the chicken during marination. In a bowl, Add 1 tablespoon of garlic paste, 1 tablespoon of ginger paste, 2 tablespoons of whisk yogurt, 2 tablespoon tandoori home-made masala powder, 2 tablespoons of lemon juice, chicken tenderizer and salt to taste. 
  • Marinate chicken pieces overnight or for an hour. Do not marinate chicken for more than 2 days as we have added chicken tenderizer which will change the texture of chicken. You can leave it without adding chicken tenderizer if you want.
Method:
  • Take out chicken from the refrigerator for at least 1 hour earlier cooking to bring it down to a room temperature. You can either roast it in the oven or barbecue over an electric or charcoal grill. I just love the smoky taste and the smell of charcoal so I prefer barbecue charcoal grill!
  • Fire the coal well in advance so that the white ashes forms over the surface of the charcoal. Which means that the coal is the hottest and ready.
  • Fix marinated chicken pieces into the skewers, and line all the chicken pieces parallel on charcoal grill. Let it cook on the charcoal flame without turning or disturbing chicken for 8-10 minutes. You can add oil or ghee on hot charcoal for increasing its flame.
  • Let the chicken cook on both the sides.
  • Cooking time, usually varies as it is dependent on the level of heat and distance from the chicken. As we have marinated chicken pieces with tenderizer therefore they will cook faster than the regular or standard barbecued chicken.
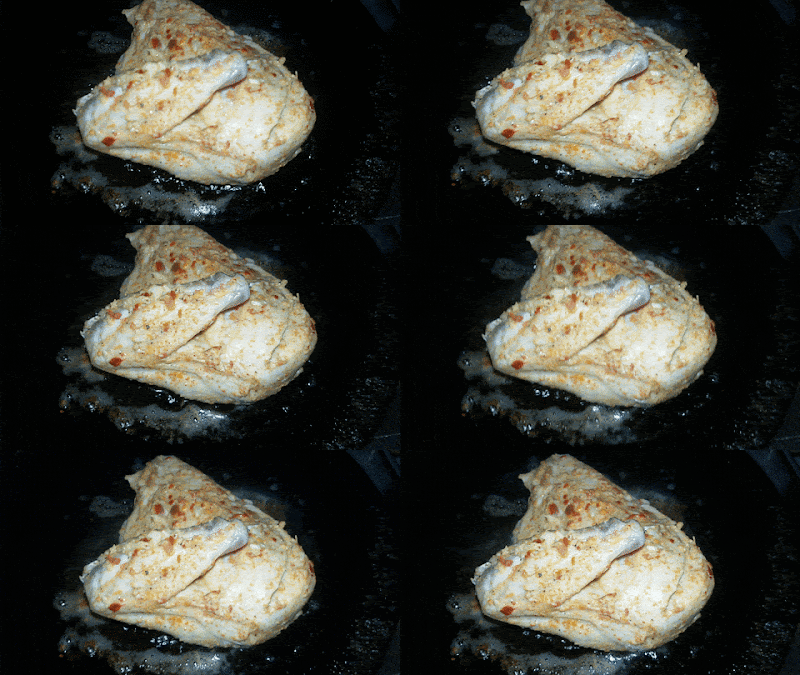
  • If you don't have any of the above options available to you, simply shallow fry these marinated chicken pieces in frying pan and let the chicken cook on both the sides. Now, put hot charcoal over the pieces and cover the pan with a lid for a minute. This idea will give a smoky flavor and taste in chicken tandoori pieces. Squeeze lemon juice on it. Sprinkle some chat masala (optional).
  • Serve hot with onion and cucumber salads, green chili chutney and tamarind chutney.
  • You can complete this meal with masala rice, naan or bun.
It is crisp on the outside and cooked in the middle. Perfect! Try this recipe in open and fresh air and enjoy it with your family and friends at picnics, house party or dinners. 

If you like the recipe then subscribe on link below for latest food updates !!!

Friday, May 27, 2016

Flavorful Rice And Lentils Biryani/ Masoor Dal Biryani Recipe

Who says you need meat to have an incredible meal! Masoor Biryani is packed with flavors and you won't even miss the meat in the slightest! This is the most easiest rice recipe I have ever come across. It's easy, healthy, doesn't require many ingredients and it will leave you craving more!

The Masoor Biryani recipe comes all straight from the houses of India. It has lentils, rice, potatoes and an aromatic flavor that we all love to eat. You can add different types of lentils as per your liking's but the rice tastes best with Masoor dal. Non-veg hoggerz don't get disappointed with this Veg dish as the good news is that you can add minced chicken while cooking it's gravy. So, in short, this dish will pamper the heart and comfort the soul with its spicy and flavorful taste.

Flavorful Masoor Dal Biryani


Preparation Time: 10 minutes
Cooking Time: 30 minutes
Total Time: 40 minutes
Serves: 2 persons

Ingredients:
1 cup Rice
1/2 cup Masoor dal or Red lentil
1/2 cup washed, peeled and chopped potatoes
1/2 cup sliced capsicum
1 medium size, roughly chopped onion
2 large size, roughly chopped tomatoes
4 washed curry leaves
4 cloves
7 black peppercorns
1 bay leaf
1 teaspoon cumin seeds or zeera
1 teaspoon mustard seeds or rai
1 tablespoon garlic paste
1 tablespoon ginger paste
1/2 tablespoon green chili paste
2 tablespoons red chili powder
1 tablespoon coriander powder
1/2 teaspoon turmeric powder
1/4 teaspoon garam masala powder
1 tablespoon roughly chopped cilantro or coriander leaves
Salt to taste

Method:
Masoor Dal Biryani Method
  • Separately wash rice and red lentils and soak them in the water half hour before the cooking process.
  • In a pan, heat oil and add 1 teaspoon cumin seeds and 1 teaspoon of mustard seeds and let them pop for a second. Immediately, add 4 cloves, 7 black peppercorns, 1 bay leaf and let it fry until fragrant. Now add 4 washed curry leaves and roughly chopped onion. Saute well and let the onions cook until translucent.
  • Add roughly chopped tomatoes and 1 teaspoon of salt. Cover the pan and cook for 2 minutes under medium heat.
  • Add 1 tablespoon of ginger paste, 1 tablespoon of garlic paste, 1/2 tablespoon of green chili paste and let it fry for 1-2 minutes on a medium flame. Add 2 tablespoons of red chili powder, 1 tablespoon coriander powder, 1/2 teaspoon turmeric powder and fry until the oil separates from the mixture. 
  • Strain the water from the soaked red lentils and add into the pan. Add chopped potatoes and mix well. Add 2 cups of water and cook the potatoes and lentils on a low-medium flame for about 10 minutes.
  • If you want to make a non-veg version of this recipe then - Simply add minced chicken and let it cook for about 15-20 minutes. Once the minced chicken is done, add red lentils and chopped potatoes and cook for another 10 minutes, so that red lentils and chopped potatoes are cooked evenly with minced chicken.
  • Now on a high flame, add the sliced capsicum and strained rice into the biryani gravy and put 1/4 teaspoon garam masala powder. Bring it to boil. Always add water to rice until it is 1-2 inch above the top of the rice otherwise rice usually gets overcooked.
  • Adjust the salt and seasoning as needed and mix well. Cover the pan and let it cook on a low flame for about 10 minutes. Turn off the flame as soon as the rice is done. 
  • Garnish with chopped cilantro and serve hot with fresh salad or chilled yogurt.
I hope you enjoy cooking as well as eating this healthy lentil meal. 

Tuesday, May 24, 2016

Not So Bitter!!! Stuffed Bitter Gourd/Stuffed Karela Recipe

Bitter Gourd or Karela is considered the most bitter vegetable maybe that's the reason it is highly used as a medicine. This recipe is for all the bitter gourd or Karela haters! 

It is not the usual recipe of bitter gourd where you normally slice the bitter gourd and add all the available spices. This recipe is filled with twist and creativity. It's fun-to-make dish that demands a lot of patience from you. But believe me the end result will make you and your family happy. I know you're majorly concern about the bitter taste, but this dish is going to surprise you with it's tangy, sour, spicy and over all finger licking element. Let's not waste our time much! Grab those green veggies and cook along with me! Scrap - fill the stuff - fry - enjoy!

Not So Bitter!!! Stuffed Bitter Gourd/Stuffed Karela Recipe

Stuffed Karela Recipe thehoggerz.com

Preparation Time: 15 minutes
Cooking Time: 30 minutes
Total Time: 45 minutes 
Serves: 2 persons

Ingredients:
1-2 Bitter Gourd or Karela
1 medium size chopped onion
4 tablespoons whisk yogurt
1 tablespoon red chili powder
1/2 teaspoon red chili flakes
1/2 teaspoon turmeric powder or haldi
1 teaspoon coriander powder or dhania powder
1/4 teaspoon roasted cumin seeds 
1/4 teaspoon roasted and roughly grounded coriander seeds
1/4 teaspoon raw mango powder or amchur powder
Salt to taste

Method:
Stuffed Bitter Gourd/Stuffed Karela Recipe
  • Wash the bitter gourd and lightly scrap the outer skin of it. Keep the scrap portion aside in a bowl as we will be using it later in stuffing the karela. Now slit the bitter gourd one side lengthwise with the help of a sharp knife. 
  • Scoop all the seeds from inside and keep the seeds aside for stuffing the bitter gourd. The inner side of Karela or bitter gourd should be empty as we need to fill the stuffing in the later step.
  • Now apply enough amount of salt on the outer and inner portion of bitter gourd. Sprinkle some salt on the scrap outer skin buds as well as the seeds which we had kept aside for stuffing the karela.
  • Leave them aside for at least half hour so that the bitter taste reduces to an extent.
  • Follow this tip every time you make bitter gourd recipe's as salt helps in reducing the bitterness of this vegetable.
  • After half hour, wash the bitter gourd and its outer skin buds so that the salty and bitter taste gets wash away and leave it aside.
  • In a pan, heat 2 tablespoon of oil, add roasted cumin seeds and chopped onions. Fry onions until they turn golden brown in color. Add red chili powder, red chili flakes, coriander powder, amchur powder, turmeric powder, roasted and grounded coriander seeds and salt to taste. Saute for a minutes and add 4 tablespoon of whisk yogurt.
  • Fry the stuffing for about 2 minutes and quickly turn off the flame. Remove the stuffing masala in a bowl and keep it aside.
  • With the help of a spoon, gently fill the stuffing inside the empty portion of the bitter gourd or karela.
  • Now wrap the karela gently with the help of a thread. This will prevent the filling or masala from coming out while steaming.
  • In a pan, add half cup of cooking oil and gently put the karela and let it cook on a low flame for about 15-20 minutes. Do not forget to turn each side of bitter gourd while it is cooking. Check occasionally.
  • Serve hot with roti's, chapati's or as a side dish.
I hope even you add this recipe in your favorite veg food menu like my hubby did!


Monday, May 16, 2016

Maharashtrian Style Tasty Zunka Recipe

Summers is practically here so that means you'll need fresh salads, juices and a light food. This quick and easy Maharashtrian-inspired dish is perfect as it is quick, inexpensive, easy to make and importantly light and tasty meal. It is basically prepared by using besan or gram flour and it takes less than 10 minutes to cook. 

Zunka is one of my new favorite homemade recipes! This was my first attempt and it turned out delicious. I remember me and my friends always used to visit Zunka Bhakar at Nariman point for this flavorful and balanced dish. My husband is not so fond of trying multicultural food, but this side dish was totally welcoming on our dinner table.

All you need is gram flour and combine all the Indian spices with a touch of fresh cilantro. I make it at least once a month when I need a quick meal. I love a meal that only dirties one pot because although I love to cook, but I don't love to clean!

Maharashtrian Style Tasty Zunka Recipe 

zunka, zunka bhakar, Maharashtrain recipe, Maharashtra recipe, zunka thehoggerz.com

Preparation Time: 5 minutes
Cooking Time: 10 minutes
Total Time: 15 minutes
Serves: 2 persons

Ingredients:
1/2 cup Gram flour or Besan
1 small size, finely chopped onion
1/2 teaspoon cumin seeds or zeera
1/2 teaspoon mustard seeds or rai
1 tablespoon red chili powder
1/2 teaspoon turmeric powder
1 teaspoon ginger paste
1 tablespoon roughly chopped coriander leaves or cilantro for garnishing
Pinch of asafoetida or hing
Salt to taste

Method:


  • In a pan, heat oil and add 1/2 teaspoon cumin seeds and 1/2 teaspoon mustard seeds. Let it splutter.
  • Now add finely chopped onions and a pinch of asafoetida or hing. Saute till the onions turn transparent. Now add 1 teaspoon ginger paste, 1/2 teaspoon turmeric powder, 1 tablespoon red chili powder and saute for a few seconds.
  • Now slowly add besan or gram flour and mix it properly on a low flame. Splash little water and mix the gram flour until it becomes a smooth thick paste. 
  • Cover the pan and splash a little water after every 4 minutes. Remove the lid and saute until the mixture starts leaving oil from the sides. Add salt and adjust the seasoning.
  • Garnish with chopped cilantro and serve hot with bhakar. Bhakar is basically a traditional Maharashtrian roti prepared by using jowar grain.
You can even dry roast the gram flour and mix it with water to form a smooth lump-free paste. I have cut down time by directly adding gram flour into the onion mixture. You can also add boiled green peas and spring onions.


If you like the recipe then subscribe on link below for latest food updates !!!


Home Made Healthy Chicken Soup

Isn't it worse when one day, all of a sudden, out of nowhere, your throat starts hurting like a hell and it just continues to hurt for almost a couple of days. I hate sore throats and this last one is a killer. What are the few things that hit your mind on sick days? Chocolate, fruit custard, cold water, cold drinks, chips and of-course hot chicken soup! Even though me and my husband weren't feeling great, I knew we needed a health pack chicken soup, so I decided to make a simple version of the soup. 

It's one of the one pot, easy to make soup that you'll be loving during your sick days as well as the entire cold season. This soup is classic, tasty that takes minimal effort yet yields tender chicken and delicious results. You can make this soup whenever you feel like as it is healthy and yummy option for your kids and loved one's. I have avoided adding veggies into it, but you can add chopped carrots, broccoli or any veggies to make it more healthy and colorful soup. I hope you too enjoy this bowl of soup any day of your life. Enjoy!

Healthy Chicken Soup

Homemade Simple And Healthy Chicken Soup, yakhni


Preparation Time: 5 minutes
Cooking Time: 15 minutes
Total Time: 20 minutes
Serves: 3 persons

Ingredients:
1/2 cup, boneless chicken, cut into small cubes or pieces
1 medium size, finely chopped onion
4 cloves, it will help in to clear up the cold
4 black peppercorns
1 bay leaf
1 cinnamon stick
1 teaspoon red chili powder
1/2 teaspoon turmeric powder
1/4 teaspoon garam masala powder
1 cube of chicken stock
1 tablespoon coriander leaves or cilantro for garnishing
Salt to taste

Method:
  • In a slow cooker, add 1 tablespoon of cooking oil, 1 bay-leaf, 4 cloves, 4 black peppercorns and 1 cinnamon stick. Let it fry for a minute until fragrant. Add finely chopped onions and cook until they turn transparent.
  • Add 1 cup boneless chicken pieces and fry them for 2 minutes on a medium flame until they change color. 
  • Now, add 1 cup of water and 1 chicken stock cube. Cover and cook on a low heat for about 10 minutes. Strain the soup if needed,
  • Garnish with chopped cilantro and serve warm.

Spicy And Tangy Spring Onion Curry Recipe

Spring onion or scallion is easily available everywhere and are widely used in Asian countries. Mama used to make packets of chopped carrots, cabbage, spring onion greens and peeled peas and then freeze them for a longer run. She makes it particularly to quick cooking when guests arrive unannounced. Mama makes noodles, manchurian balls, salads and schezwan rice using scallions that is certainly a favorite with my friends and cousins who would promptly ask mom to make a big batch of noodles and rice when they would come over for a night out. 

Spring onions have always tasted better when cooked with egg plant and fried rice that keeps me hankering till today. I am in love with spring onions these days that I can almost prepare everything out of these green leaves. Today, I have tried making a recipe using spring onions as the main ingredients and it tastes just splendid.

I always try to share easy, quick and delicious recipes with you all so that you too enjoy cooking effortless food in a less duration of time. I don't like summer at all but I do like one thing about it and it is fresh green vegetables. I like the mild flavor of spring onions and love to use it in many recipes. Me and my loving husband aren't feeling well from the past four days, so I thought to prepare this simple yet delicious curry using readily available ingredients in my pantry.

Spicy And Tangy Spring Onion Curry Recipe


Preparation Time: 5 minutes
Cooking Time: 5 minutes
Total Time: 10 minutes
Serves: 2 persons

Ingredients:
2 spring onions white, sliced
2 spring onion greens, roughly chopped 
2 medium size roughly chopped tomatoes
1 teaspoon garlic paste
1 teaspoon cumin seeds or zeera
1/2 teaspoon mustard seeds or rai
1 tablespoon red chili flakes
1/4 teaspoon ground coriander seeds
1/2 teaspoon turmeric powder
1/2 teaspoon coriander powder
Salt to taste

Method:
  • In a pan, heat cooking oil and add cumin seeds and mustard seeds. Let them pop for a while.
  • Now add sliced spring onions and saute until it turns translucent. Add finely chopped tomatoes and salt to taste. Cover the pan and let it cook for 2 minutes on a low flame.
  • Add 1 teaspoon garlic paste, 1 tablespoon red chili flakes, 1/4 teaspoon ground coriander seeds, 1/2 teaspoon turmeric powder and 1/2 teaspoon coriander powder. Mix well and let it cook until oil separates from the mixture.
  • Add roughly chopped spring onion greens and half cup of water. Cover the pan and let it cook till you get the desired consistency of the curry. 
  • Serve hot with steam rice or roti's.
Your 5 minute recipe is ready to serve!  You can also use canned tomatoes and green chilies since they are less spicy. Simple, unbelievably satisfying and easy cleanup. Enjoy! 

Friday, May 13, 2016

Easy & Crispy Chicken Nuggets Recipe

Being brought up in Gujarati family I was encircled with veggies. My family was different, they never restricted us towards one particular delicacy, but being frank I was never attracted towards non-veg food. Mainly because I was always anxious about the blood, raw flesh and of-course the smell that nauseate me! But when you are surrounded by multi-cultural friends you end up tasting various delicacies from north indian food to south indian food. Woven into the assignment and projects were the details of college lunches, picnics and treats some of which was very different of what I ate. I had a curious appetite and this become yet another reason to try out something new. So my fear got bumped into nugget eating by a simple sharing of tiffin boxes.

While I was completing my Java project, my bff offered me her lunch box that included hot and crispy chunks of nuggets along with roughly fried peas and potato salad. The first bite just tasted like soya nuggets and It was difficult to imagine chicken nuggets when I had never eaten them. Soya nuggets are my distraction and I just like to eat them hot spicy, as they absorb all the flavor within them giving a soft and juicy taste. Chicken nuggets had a different texture as they were made by mixing in a few spices and coated with bread crumbs but tasted exactly the same. I was in a totally different world when I tasted that small chunk of gold and it was yummy! I must say chicken sometimes does taste like soya nuggets, a hardcore vegetarian like me couldn't pick out the difference between the two!

After that, It took me 4 years to try other non-veg dishes, and this went possible after knowing my hubby's love towards non-veg. His world revolves around meat, chicken, eggs and seafood. Being a vegetable averse I cannot think of serving him full bowl of veggies. All I can do is hide veggies by mixing a small amount of pureed vegetables with chicken or meat dishes! I started developing and presenting different varieties of non-veg cuisine over the dinner table to satisfy his fancy wish for non-veg.

Today, I am going to share my favorite non-veg recipe as it's the only chicken dish I tasted the very first time in my life. I personally prefer roasted, bbq or fried chicken over any chicken gravy, as I am not a constant non-veg eater and chicken gravy doesn't fascinate me in eating. 

We prefer to eat a lot of nuggets at dinner, sometimes twice in a week not just because I love the touch of Oregano in it, but it's less oily & incredibly yummy. Chunks of chicken pieces coated with breadcrumbs and any herbs or spice can be a perfect easy chicken recipe. It is not only kids friendly, but also a bit size goodies for your family. 

It's a human tendency that we easily feel monotonous with the same style, taste, appearance of the typical usual menu. This crispy recipe of chicken magically adds uniqueness in your daily food menu. Serve it as a snack, starter or side dish. It is not overly spicy yet satisfying our taste buds. Just a few kicks of spices and your dish is almost ready. You can definitely add herbs and sauces of your choice but this is the standard recipe I prefer for chicken nuggets. 


Let me tell you, it is a freezer friendly dish too. Yes! Follow all the procedure till coated chicken pieces with bread crumbs & deep freeze them & remove half hour before frying. Isn't it cool, quick, easy & great idea to save you time!

Chicken Nuggets

Easy & Crispy Chicken Nuggets Recipe

Preparation Time: 20 minutes
Cooking Time: 10 minutes
Total Time: Not more than 30 minutes
Serves: 2-3 persons

Ingredients:
1/2 kg boneless chicken pieces
1 egg
1 cup cooking oil
Quarter teaspoon black pepper (one half teaspoon = 2 quarter teaspoons)
1/2 teaspoon white pepper powder
1/2 teaspoon mustard paste
1 tablespoon of red chili powder or red chili flakes
1/2 teaspoon Oregano
1 tablespoon lemon juice
2 tablespoons of cornflour or cornstarch
1 cup of all-purpose flour or maida - for coating chicken pieces
1 cup bread crumbs
Salt to taste

Method:
Chicken Marination
  • In a bowl, add the chicken pieces (cut it in 2-inches), quarter teaspoon black pepper powder, half teaspoon of white pepper, half teaspoon mustard paste, 1 tablespoon red chili powder, half teaspoon oregano, 1 tablespoon lemon juice and salt to taste. Mix everything properly and add beaten egg into it and mix well. Add 2 tablespoons of cornflour and mix everything together. Marinate for not more than 10 minutes. Double these for more servings or make half for less servings.
Dipping, Coating And Frying

  • Remove one piece of chicken and coat it with all-purpose flour or maida and then the breadcrumbs by gently pressing the crumbs into the chicken piece & set on a clean plate. Repeat the same procedure with the remaining chicken pieces.
  • In a frying pan, heat cooking oil on a medium flame, now gently place all the chicken pieces one by one & shallow fry them on each side. Turn chicken pieces to the other side if one side of chicken nuggets has turned brown in color. You will see a crispy coating on each side of the nuggets. 
  • I prefer to shallow fry them, you can even deep fry if needed. Always test one chicken piece by frying it & taste, adjust spices and salt & proceed frying all the chicken pieces. 
  • Serve hot with tomato sauce, cheese dip or mayonnaise. 
It's a complete meal with white sauce pasta, noodles or salads & enjoy eating this finger food :)

Monday, May 9, 2016

Easy-To-Make Pan Fried Chicken Tandoori Recipe

I love roasted chicken filled with fresh aroma of hot charcoal, crispy and tender chicken covered with the blanket of red color. The highly developed and enticing smell of chicken tandoori wafting from the kitchen has always whetted my appetite. My weekend menu is inevitably packed with the list of roasted or pan-fried chicken. These days, my hubby is super obsessed with barbecue, roasted chicken dishes so I am too busy in satisfying his urge of list by playing with a different set of seasoning to deliver totally different balance of food!

This pan-fried chicken recipe is an oldie but goldie recipe that I make regularly at home! I usually make them in my non-stick pan, but they are also great on the grill, they come out exceptionally succulent and absolutely delish! I had served this with lemon rice (my brother's favorite combination) with a big bowl of salad. My family just loves it. It can be served as an appetizer or as a side dish. You can marinate them as little as 15 minutes or as long as overnight or a week!

You can use the leftover chicken tandoori by shredding the chicken pieces and combining them with salads as a wonderful topping or you can even use the shredded chicken in your sandwiches with mayonnaise and few lettuces.   

Pan Fried Chicken Tandoori 

Easy To Make Chicken Tandoori Recipe, Roasted Chicken, BBQ Chicken food recipes

Preparation Time: 40 minutes
Cooking Time: 20 minutes
Total Time: 1 hour
Serves: 3 persons

Let's make home-made Tandoori masala (mixture of spices) home:
Ingredients:
2 tablespoons coriander seeds
2 tablespoons cumin seeds
2 tablespoons red chili powder
1 tablespoons dried fenugreek leaves
1 tablespoon black pepper powder
1 tablespoon paprika powder
1 cinnamon stick
1/2 teaspoon cloves
1 tablespoon garlic powder
1 tablespoon ginger powder
1/4 teaspoon garam masala powder

Method:
  • In a frying pan, dry roast 2 tablespoons coriander seeds, 2 tablespoons cumin seeds, 1 tablespoon dried fenugreek leaves, 1 tablespoon black pepper powder, 1 tablespoon paprika powder, 1 cinnamon stick, 1/2 teaspoon cloves, 1 tablespoon garlic powder, 1 tablespoon ginger powder, 2 tablespoons red chili powder, 1/4 teaspoon garam masala powder for a minute until fragrant. Remove all the roasted masala on a plate and let it cool.
  • In a grinder, add all the roasted spices and grind into a powder. Store it in an airtight jar and use it whenever you want.
  • Use this home made tandoori masala in chicken, meat, fish or prawns. It will taste simply amazing!
Ingredients for Tandoori Chicken Recipe:
1/2 kg chicken boneless pieces
1/2 cup, whisk yogurt
2-3 tablespoons home-made tandoori masala powder
1 teaspoon garlic paste
1 teaspoon ginger paste
1 tablespoon lemon juice
1/4 teaspoon red chili flakes, that's optional if you too prefer more spice in your food
1/4 teaspoon chat masala powder 
1/4 teaspoon red color, optional
Lemon wedges for garnishing
Onion rings for garnishing 
Salt to taste

Method:
  • Wash and clean chicken breast and cut them into cubes or small pieces.
  • Now add half teaspoon red chili flakes, 1/2 tablespoon lemon juice and half teaspoon salt and mix it properly with the help of clean hand. Refrigerate it for 15-20 minutes.
  • In a bowl, add half cup of whisk yogurt, 2 tablespoons home-made tandoori masala powder, 1 teaspoon garlic paste, 1 teaspoon ginger paste, 1 tablespoon lemon juice, 1/4 teaspoon of red color (optional) and 1 teaspoon of cooking oil. Mix it well.
  • Apply this yogurt batter onto the chicken cubes. Refrigerate it overnight or 1 hour before the cooking process.
  • In a non-stick pan, heat cooking oil and fry chicken pieces on a low flame.
  • Allow chicken to fry on both the sides until they turn reddish in color. Normally, chicken doesn't take much time in cooking. 
  • Remove to a plate and sprinkle chaat masala powder all over it, optional. Garnish with spring onions and lemon wedges. Serve hot with paratha's and team up with green chili chutney or tamarind chutney. Chicken tandoori also goes well with hakka fried rice!
This chicken recipe is so convenient that you can marinate the chicken pieces and refrigerate it for a week. Fry or BBQ them whenever you feel like. Isn't it easy and quick recipe!

Thursday, May 5, 2016

Finger Licking Chicken Chargha Recipe

Chicken Chargha is one of the flavorful roasted item of food that can be a added for supper on a serving salver at family occasions. Chargha is the deep frying process of the whole chicken which is marinated overnight or 2-3 days prior so that the chicken sucks in all the masala or spices giving a pleasant, mellow dish. This simple marinated chicken recipe is easy, demands a lot of patience from you and comes out exactly like served in restaurants. This recipe is my husband's favorite party meal, whenever we throw a party, he insists me to make chicken chargha with a zest of tangy tamarind sauce. If you too love roasted chicken, then this one is definitely delicious and mouth-watering meal for you. 

So I decided to create a simplified version of it that can be made into an easy weeknight dinner. I have made a few changes from the original recipe. I have replaced yogurt with eggs as I feel that yogurt lightens the spicy taste. All it needs is marination, steaming and frying for crispy coating. You get perfectly golden, tender chicken with a hint of lemon and flavor paired with spicy and tangy tamarind sauce. I am sure, once you try this simple dinner you'll be hooked! 

It's so good and easy that it will likely become a regular meal on your menu! I was savoring each and every last bite and I can't wait to make them again and again.

Chicken Chargha 

Chicken Chargha, Roasted Chicken Food Recipe

Preparation Time: 20 minutes
Cooking Time: 40 minutes
Total Time: 1 hour
Serves: 2 persons

Ingredients
1 chicken airline breast, I am sharing this recipe with little quantity of ingredients, especially for the newbies trying this recipe. Double the quantity for more servings.
Few tablespoons of cooking oil
1 egg, beaten
1 tablespoon garlic paste
1 tablespoon ginger paste
1 tablespoon lemon juice
3 tablespoons red chili powder
1 tablespoon red chili flakes
1 teaspoon cumin powder or zeera powder
1/2 teaspoon garam masala powder
1/4 teaspoon red color
1/2 teaspoon chat masala powder, optional
Salt to taste

Method:
Roasted Chicken Cooking Process
  • Lets marinate! Always give cuts on the flesh of the chicken before marination process. This will help the spices to enter into the chicken as well as this idea will allow the heat to penetrate more evenly throughout the cooking process. 
  • In a bowl, add chicken, ginger and garlic paste, 3 tablespoons red chili powder, 1 tablespoon red chili flakes, 1 teaspoon cumin powder or zeera powder, 1/2 teaspoon garam masala powder, 1/4 teaspoon red color, 1 tablespoon lemon juice and Salt to taste. Mix the spices well and rub it properly into the cuts so that the spices penetrates in well.
  • Now add beaten egg and mix with the help of your hand. Do not forget to wash your hands before mixing. You can adjust the spices as per your likings. Leave it aside for 10 minutes.
  • Place each chicken pieces one by one in a steamer basket and steam chicken for about 15-20 minutes.
  • In a frying pan, add a few tablespoons of cooking oil and heat it on a medium-high flame and fry the steam chicken on a medium flame until it changes its color to golden brown. I prefer to shallow fry them, you can even deep fry in a wok for quick results.
  • Remove it on a plate and sprinkle chat masala powder and lemon juice over it. Serve hot.
I have cut-down time by marinating chicken for 10 minutes. You can also leave it overnight for intense, flavorful taste. If you're planning to marinate it overnight, then simply marinate chicken without mixing fluffy beaten eggs with spices. Add beaten egg while you're preparing the dish.

It taste's best with paratha's, onion salad and spicy tamarind chutney or sauce. This is a spicy dinner, but you can definitely adjust it to suit your taste.

Click here for Tamarind Chutney/Sauce recipe!


If you like the recipe then subscribe on link below for latest food updates !!!


Tuesday, May 3, 2016

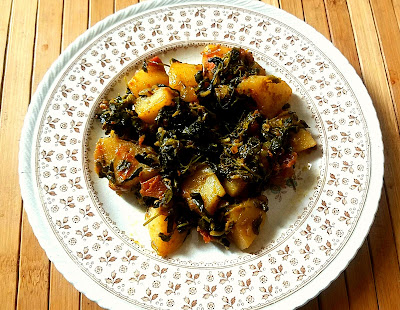
Potatoes With Fenugreek Leaves/Methi Aloo Recipe

methi allo, veg recipe, methi aloo recipe thehoggerz.com
Whoa! My first green leafy vegetable recipe! 

I have been grown up eating this green leafy vegetable all the time. To be honest, I really don't even like fenugreek leaves all that much. I remember my mom always trying different variety of snacks where methi leaves were its core ingredient. Methi is considered as the most nutritive and healthy leafy vegetable maybe that's the only reason my parents have always pushed us in its intake. I am blessed with healthy skin because of my parents healthy food intake mantra. Remember! Whatever we eat reflects on our skin!.